A source is something to show, a shot places sources in the frame, and a layer holds shots, one of them live: the three ideas every page of the Studio uses.
The Studio builds the program from three things. A source is something to show or hear: a camera, a clip, a picture, a web page, a window, an audio input. A shot places one or more sources in the frame. A layer holds shots, and at most one shot per layer is on the program at a time. The program is all layers stacked, the first layer in front.
Sources
Section titled “Sources”Sources sit in the sidebar on the left, grouped by type: Video, Media, Images, HTML, Web, Audio and Patterns. A source is kept once in the show, however many shots use it. Drag a source onto a layer to make a shot of it. The Sources section explains each type.
Shots and elements
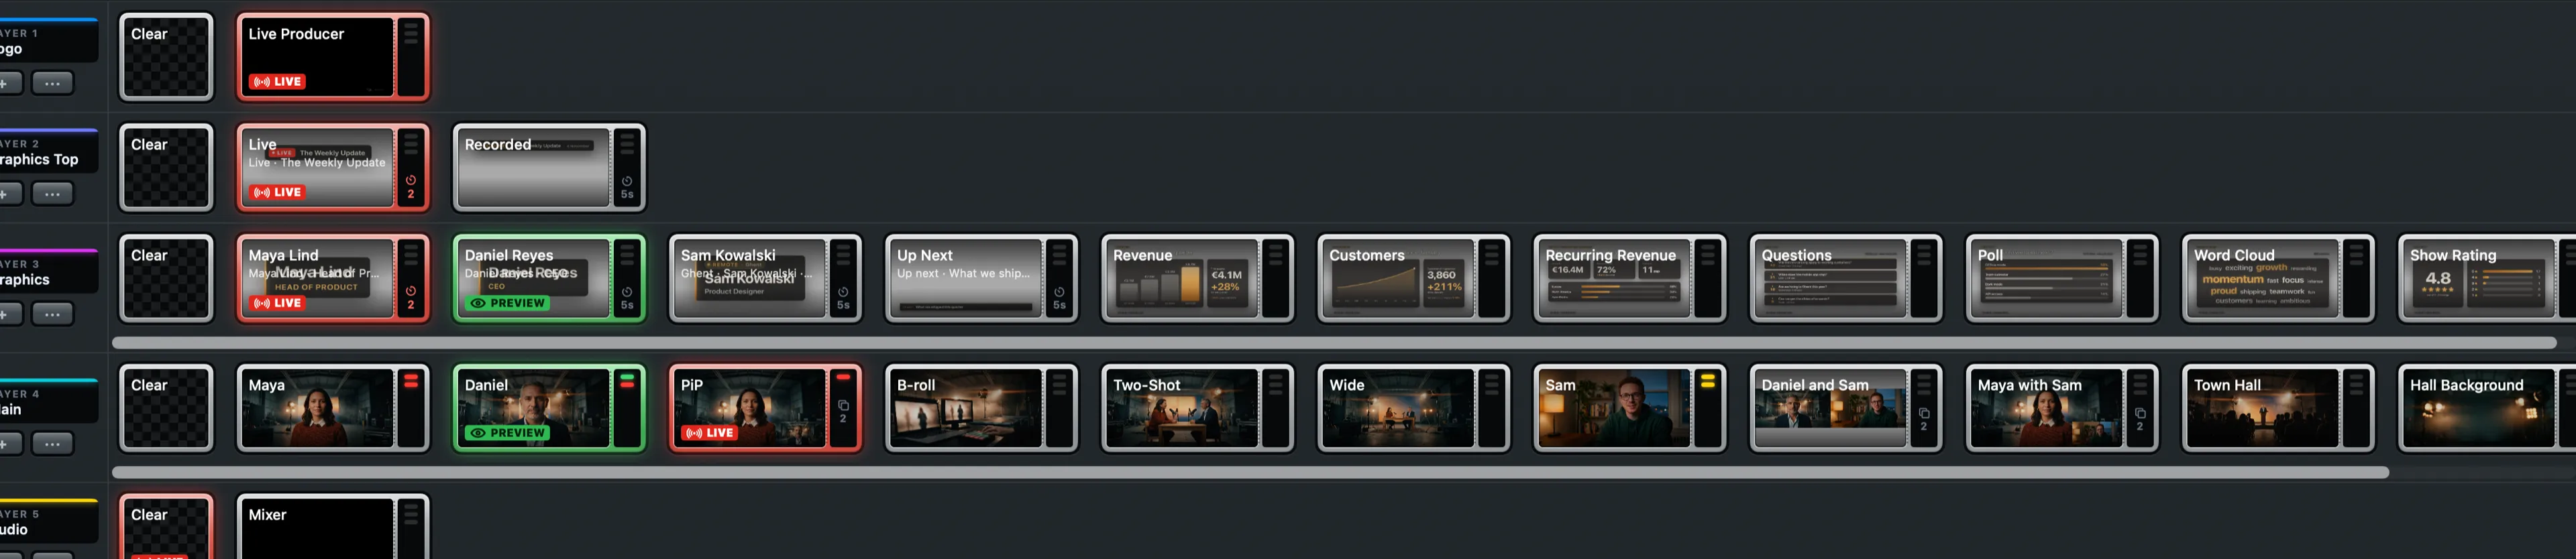
Section titled “Shots and elements”A shot is a tile in a layer strip. Each source in a shot is an element, with its own position, size, look and effects, set in the inspector or by dragging it in the preview (see Editing canvas). A picture in picture is one shot with two elements.
A tile tells its state in words as well as colour: PREVIEW (green) waits for the next Take, LIVE (red) is on the program, and EDITED (orange) is a live shot changed since it went live.
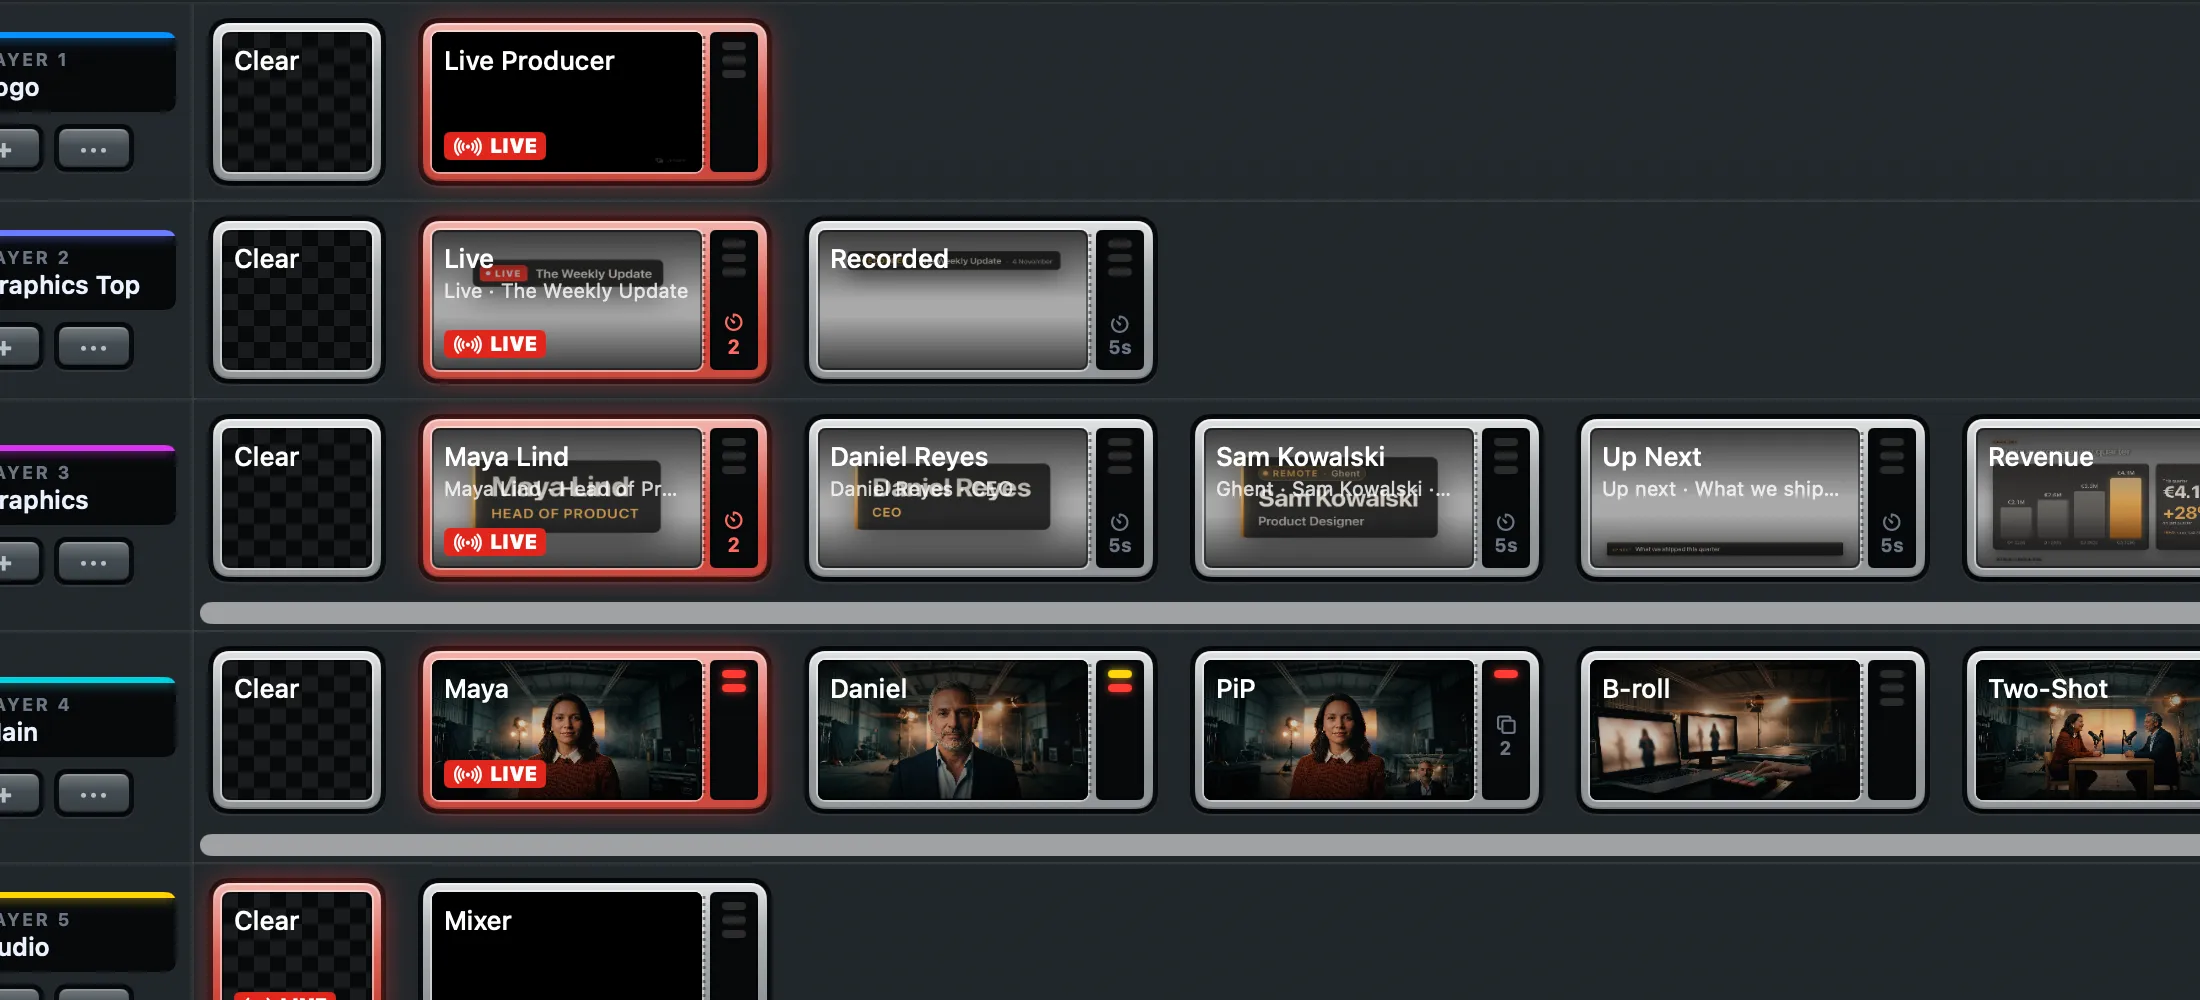
Under the name, a tall enough tile says what a graphic shows (“Maya Lind · CEO”) or which channels an audio shot hears. Other shots have no second line, so the picture stays clear.
The tab
Section titled “The tab”Every shot tile has a narrow tab on its right, behind a dotted seam. It holds, from top to bottom:
| In the tab | Means |
|---|---|
| Lamps | One per shot it brings along: yellow when set, green while that shot is in preview, red while it is live. Three dark lamps when it brings nothing along. |
| A stack with a number | How many elements the shot has, from two. A shot of one element shows none. |
| A timer | The shot’s Auto Out: its time, or the seconds left while the shot is live. |
The tab is the same width at every layer height, so the tiles line up in a grid.
Graphics on their tiles
Section titled “Graphics on their tiles”A lower third or a logo fills only part of the frame, so its tile would be a thin strip or a dot on black. Its tile, and its key on a Stream Deck, zoom in on what the graphic shows, on a grey it reads on: dark behind white text, light behind a dark logo. The zoom is drawn from the graphic itself, so it stays sharp. A camera, a clip and anything else that fills the frame keep the whole picture, and so does a graphic that shows nothing yet, such as one that waits for its cue. The preview, the program and the multiview are never zoomed.
Layers
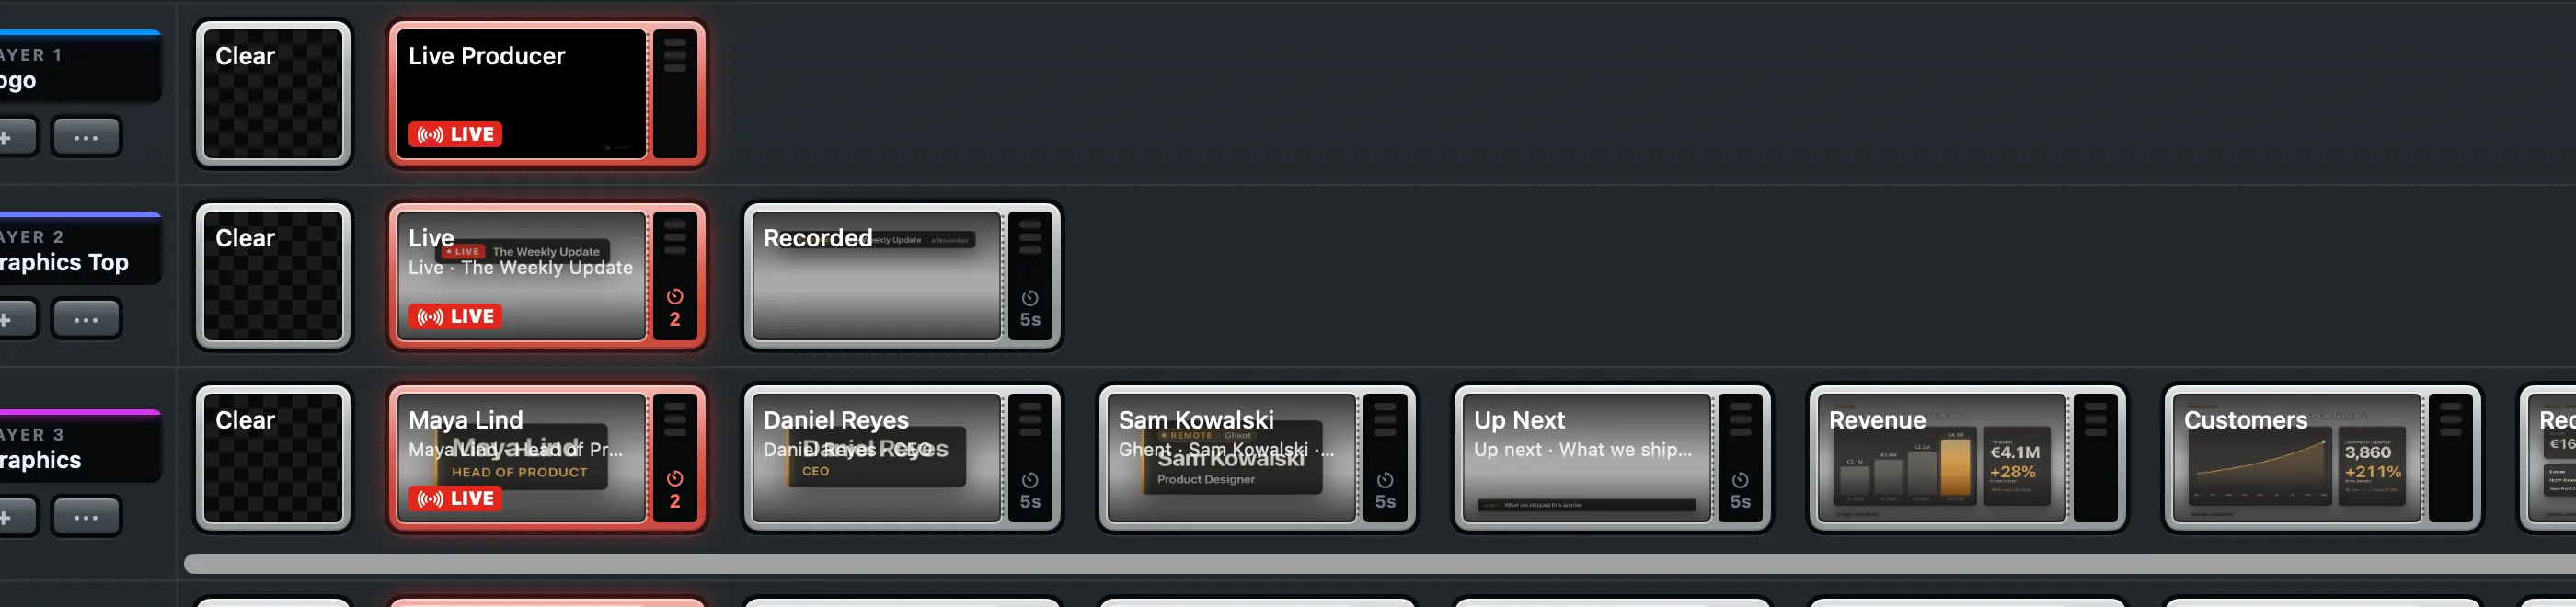
Section titled “Layers”Layers let several things be on air at once: a camera on one layer, a lower third over it on another, a logo on a third. Taking a new lower third replaces only the lower third. A show starts from a layer setup and can have any number of layers. Each strip’s ··· menu, its right-click menu and the Layer menu rename, recolour, size, move, merge and delete it. A layer’s name is a label only: every layer behaves the same.
The first tile of every layer, Clear, with a checkerboard, stands for “nothing on this layer”. It works like a shot: take it to clear the layer. It shows LIVE while the layer has nothing on the program.
Preview, program and Take
Section titled “Preview, program and Take”You choose shots for the preview, then Take sends every layer’s choice to the program at once, with the show’s transition. With Auto Live on, a click goes to the program straight away and the preview rests.
Edits are never live. Changing a shot that is on the program changes only the preview; the tile says LIVE and EDITED until the next Take sends the new version.
Auto Out
Section titled “Auto Out”A shot can leave the program by itself, as a lower third that stays five seconds. With Auto Out on in the shot’s inspector, the time in Out After (0.5 to 120 seconds, 5 by default) starts once the shot’s transition in is done. Then the shot goes with the show’s transition, as a Clear would. The live tile counts down in its tab, in red.
Brings Along
Section titled “Brings Along”Some shots belong together: the host’s camera and the host’s lower third, a guest and their name. Brings Along, in the shot’s inspector, lists the shots on other layers that can come with it, so one press puts them all on, every layer’s transition starting at the same moment. You choose at each press whether they come, because the lower third is wanted the first time the host is on, not every time.
| Press | Does |
|---|---|
| Click the tile’s picture | The shot alone, as always |
| Click the tile’s tab | The shot with what it brings along |
| ⌥-click | Swaps the two: the picture brings them along, the tab is the shot alone |
| Double-click | Goes live: alone on the picture, with them on the tab |
Without Auto Live, a press with them puts them all in the preview and one Take sends them. With Auto Live on, they go live in one step. Point at a tab and the tiles of the shots it would bring along get an outline of yellow and black dashes. The tile’s menu names them, such as Go Live with Daniel Reyes.
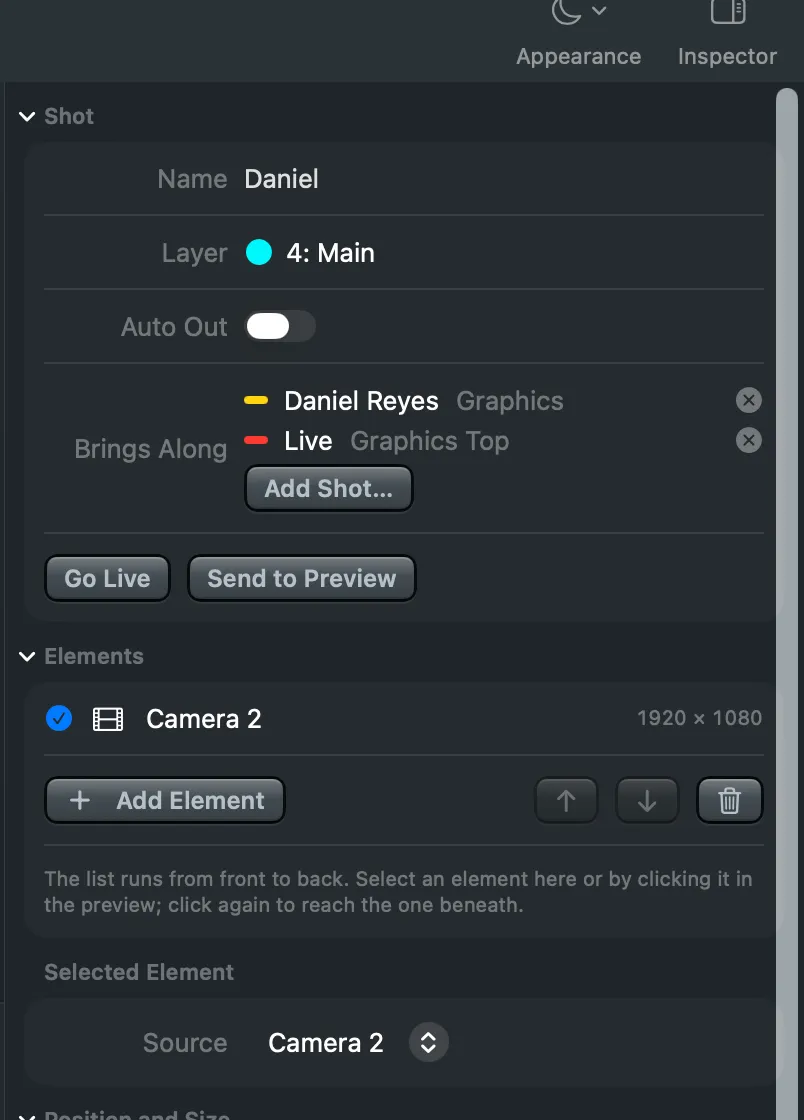
- One per layer. A shot brings along at most one shot from each other layer, never one from its own. Adding a second from the same layer replaces the first.
- Alone never removes. Pressing a shot alone leaves a lower third that is already live on the program until its Auto Out or your next change on that layer. Pressing it with them again starts that lower third’s Auto Out again.
- One level. A shot that comes along does not bring its own list.
- Clear brings nothing along.
- Changing the list is an edit to the show, undone with ⌘Z. Pressing is a live action and is never undone.
The same choice is on the keyboard (Switcher › Go Live with Selected Shot and Its Shots, ⌥⌘Return, and Switcher › Send Selected Shot to Preview with Its Shots, ⌥⇧Return), on the Stream Deck by holding a shot key, on the phone remote by its card’s tab or a long press, and in the control API. Spelvin can propose what a shot brings along, but never presses it.
How the strips look
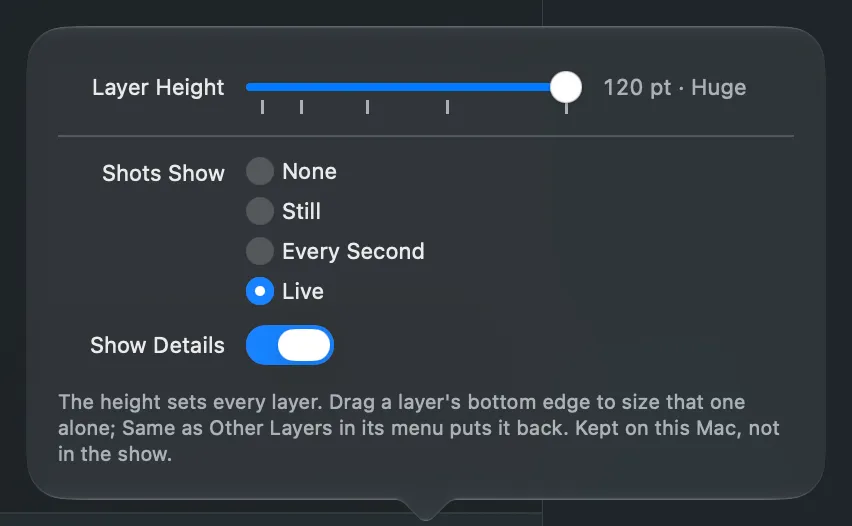
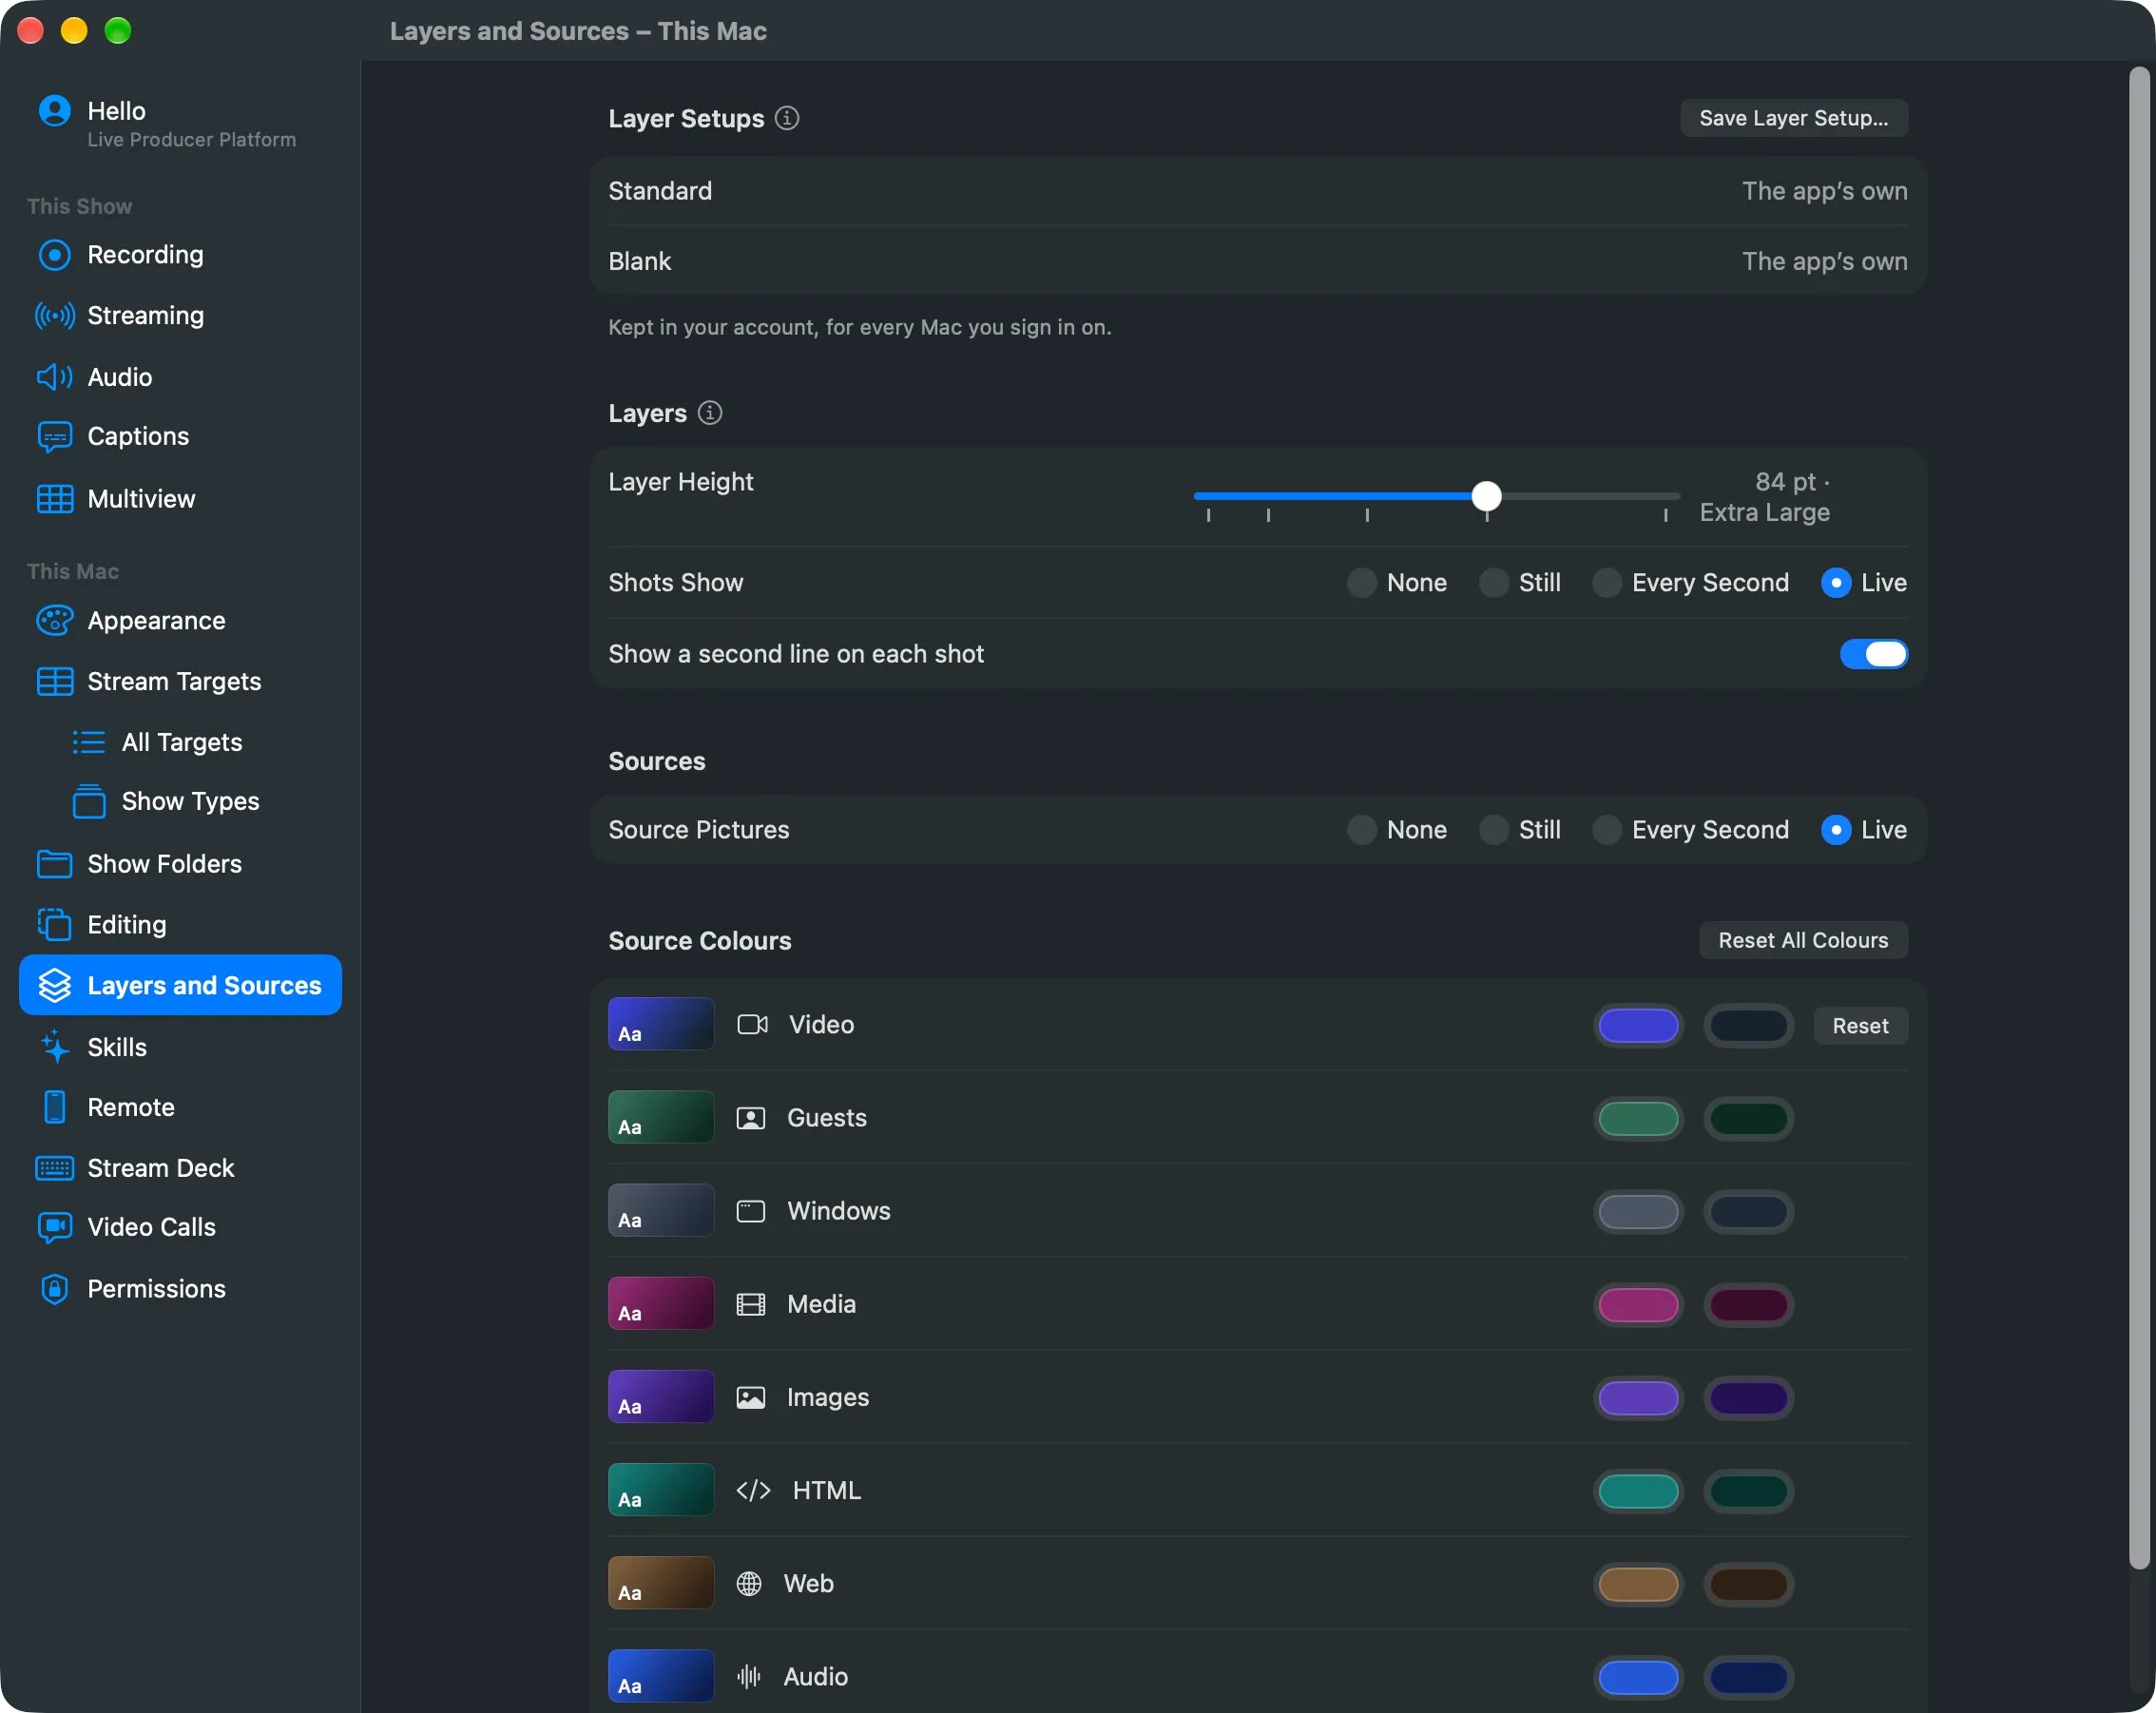
Section titled “How the strips look”View › Layer Height, the Layer Display button under the strips and Settings › This Mac › Layers and Sources set how tall the strips are and what the tiles show: None (the source type’s colour and name), Still, Every Second or Live. Drag a strip’s bottom edge to size that layer alone. These are this Mac’s settings, not the show’s.
The height goes from 28 to 120 points, with five stops: Small (28 pt), Medium (40), Large (60), Extra Large (84) and Huge (120), for large tiles on a large screen. View › Layer Height › Smaller Layers (⌃⌘-) and Larger Layers (⌃⌘=) step from one stop to the next, and the slider in the Layer Display popover has a mark at each.
Read more
Section titled “Read more”Describes Live Producer 0.330 · 10 November 2026