Add a camera as a source and make a shot from it. The same steps add any other source from the Add Source menu. See Cameras, NDI and DeckLink.
Before you start
Section titled “Before you start”- Connect the camera to this Mac.
- Open the show in the Studio.
Step 1: Add the camera
Section titled “Step 1: Add the camera”Click Add Source at the bottom of the sources sidebar, or choose Switcher › Add Source. Under Cameras, choose the camera.

The first time, macOS asks for permission to use the camera. Allow it.
Step 2: Check the source
Section titled “Step 2: Check the source”The camera appears in the Video group of the sidebar. Select it and look at the inspector’s Source section:
| Field | What to look for |
|---|---|
| Status | Receiving |
| Picture | the size and the frames the camera sent in the last second, live: “1920×1080 at 25 fps”; a dip is a stutter |
| under Picture | no warning; a warning says the camera’s rate does not fit the show’s and names the rates to set the show to |
| Location | the camera, as macOS names it |
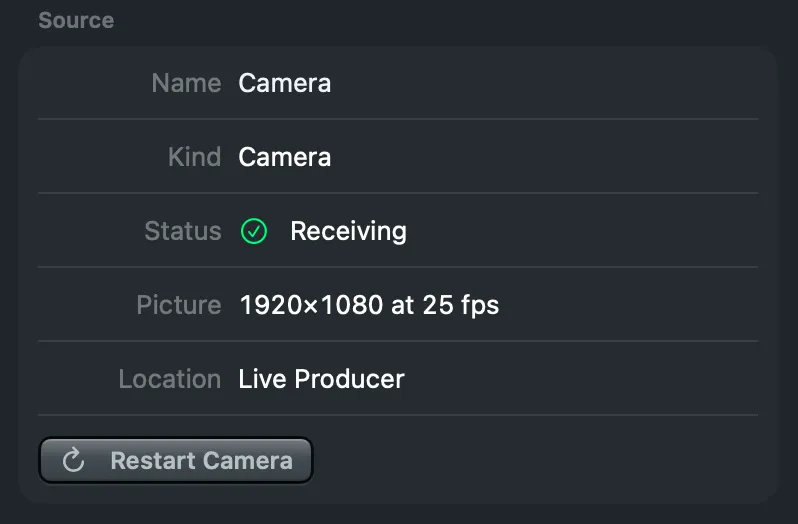
A camera that stops sending reads Not receiving; the Studio sets it up again by itself, and Restart Camera does it at once. See Status and sync.
Give the source a name the crew knows in Name, for example “Host”.
Step 3: Make a shot
Section titled “Step 3: Make a shot”Drag the camera’s tile onto a layer strip. The shot appears on that layer. Or right-click the tile and choose a layer under New Shot in Layer.

Verify
Section titled “Verify”Click the new shot. The preview monitor shows the camera. Press Take to send it to the program. See Take and cut.
Related
Section titled “Related”Describes Live Producer 0.330 · 10 November 2026