
Add Clean Voice to a microphone, learn the room's tone, choose a strength and compare.
Take the noise out from around a presenter’s voice before it reaches the program, the stream and the recording. See Clean Voice.
Before you start
Section titled “Before you start”- Open the show, with the microphone’s source in it: an audio input, a camera’s microphone or a guest slot.
- Do what the room allows first: microphone close, fan off, gain below clipping. See Treat the room first.
Step 1: Add Clean Voice
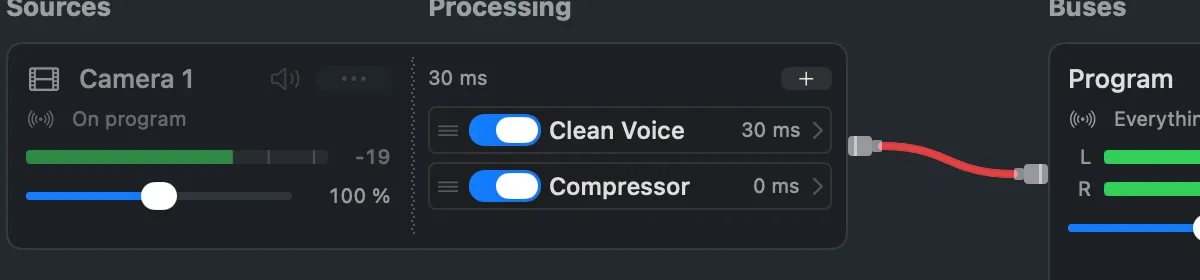
Section titled “Step 1: Add Clean Voice”Open Window › Audio Routing (⌥⌘A). On the source’s card, click Add Step in its processing half (the + when it has steps already) and choose Clean Voice under Live Producer. Or select the source in the main window and choose Audio › Add Step › Clean Voice.
The step is on at once, heard on the program too. Its row shows 30 ms.
Step 2: Open its window
Section titled “Step 2: Open its window”Click the step’s row. The window shows the sound going in, in grey, and coming out, in blue.
Step 3: Learn the room’s tone
Section titled “Step 3: Learn the room’s tone”Ask the room to be quiet, then click Learn Room Tone. The Studio listens for 5 seconds; the room’s sound appears dashed in the graph, and the row says Learned with the time. Cancel stops it.
Step 4: Choose the strength
Section titled “Step 4: Choose the strength”| Strength | For |
|---|---|
| Light | a quiet room, a lav, a remote guest |
| Strong | a noisy room |
For a lav in a quiet room, tick Quiet Between Words to silence the room between sentences, and lower Opens At if the start of soft words is cut.
Step 5: Compare
Section titled “Step 5: Compare”Hold Hold to Compare in the toolbar while the presenter speaks: you hear the source without Clean Voice. Let go to hear it again.
Verify
Section titled “Verify”- The blue line in the graph is lower than the grey between the words.
- The status line under the columns says the picture is delayed 30 ms to match the source.
- ⌘Z takes the step away again if you change your mind.
Related
Section titled “Related”Describes Live Producer 0.330 · 10 November 2026