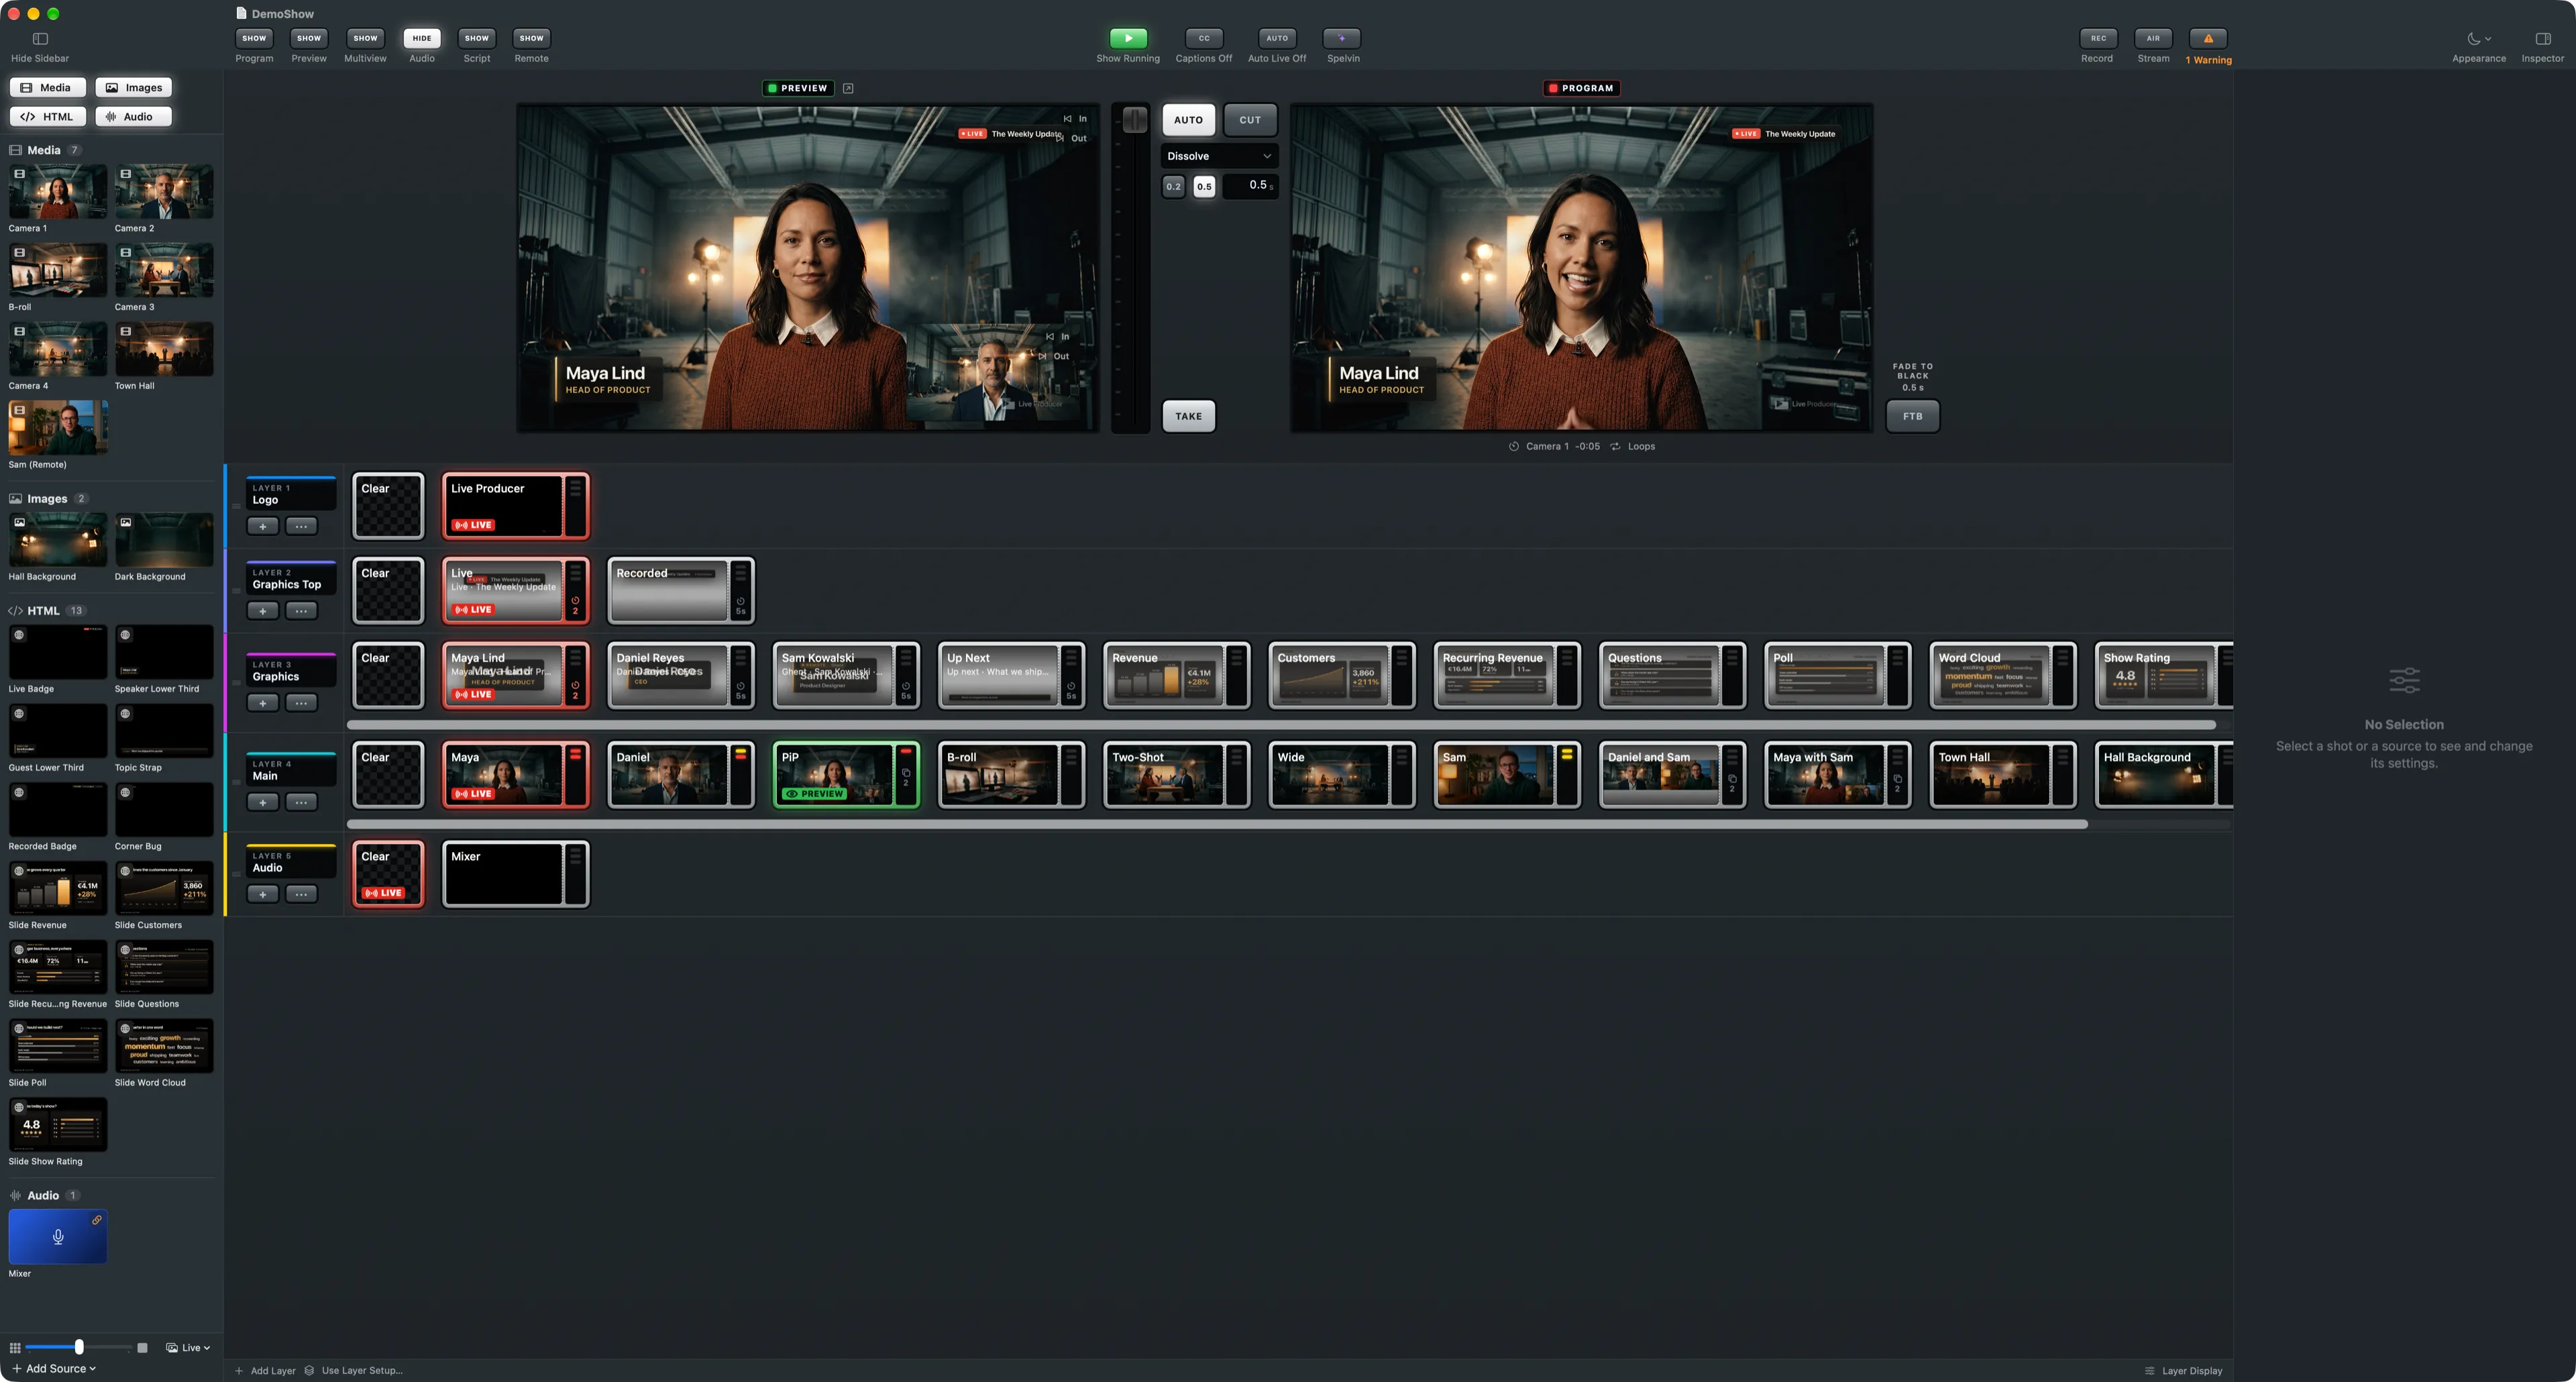
The toolbar, the sources sidebar, the preview and program monitors with the transition column, the layer strips, the inspector and the status bar.
The main window of Live Producer Studio, here with the demo show open. Sources are on the left, the preview and program monitors above the layer strips in the middle, and the inspector on the right. Every command is also in the menu bar. Click a picture to see it full-screen.
The toolbar
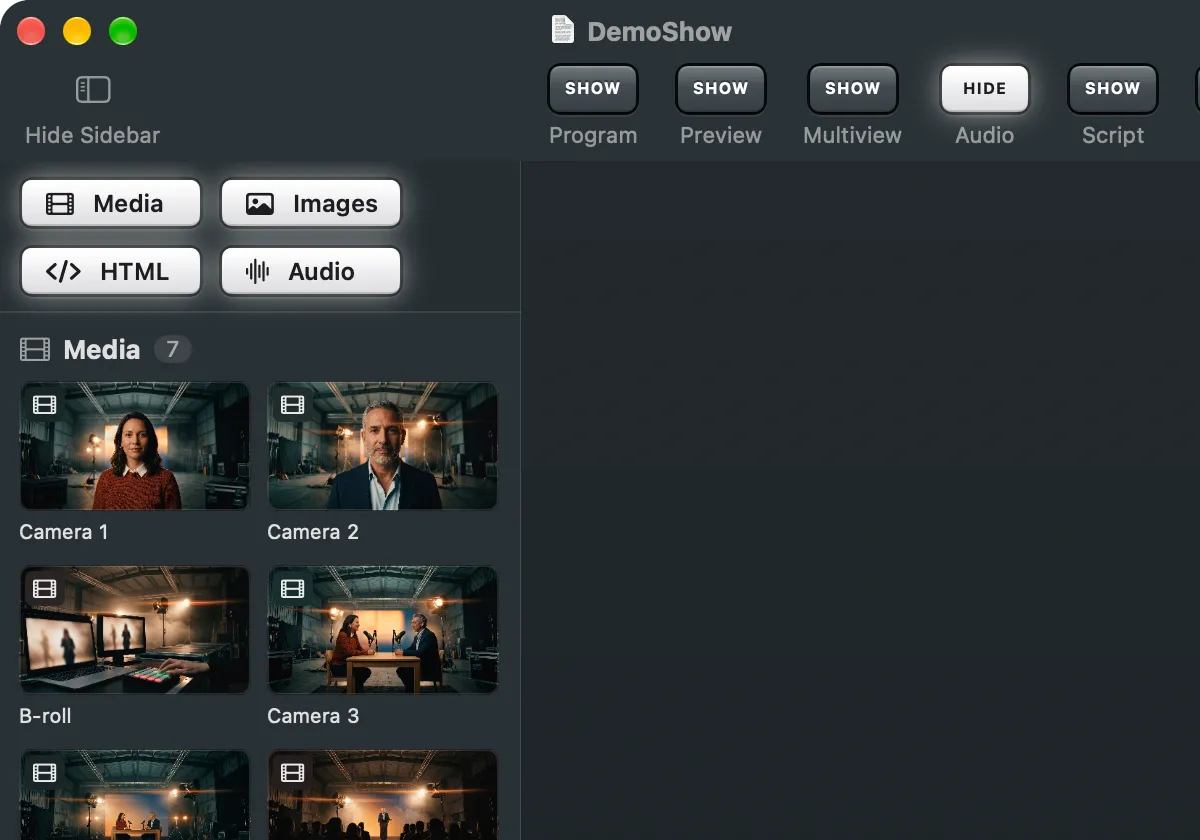
Section titled “The toolbar”The show’s name sits above the toolbar, with Edited while it differs from its file. Double-click an empty part of this top bar to zoom the window, or to minimise it, as you chose for a title bar’s double-click in the Mac’s System Settings › Desktop & Dock.
Hide Sidebar, at the left over the sidebar, hides the sources (⌃⌘S); it says Show Sidebar while they are hidden. The other items come in groups, each with its label under it:
| Group | Items |
|---|---|
| Windows | Program, Preview, Multiview, Audio, Script, Remote: each says SHOW or HIDE, what a press does |
| Show | Start Show (the show clock), Captions, Auto Live, Spelvin |
| Output | Record, Stream, Warnings; a performance indicator appears before Record when this Mac is under load |
| View | Appearance (System, Light or Dark) and Inspector |
See Other windows for what each window is, and Warnings for the Warnings key.
The sources sidebar
Section titled “The sources sidebar”Every source of the show as a tile, grouped by type: Video, Media, Images, HTML, Web, Audio and Patterns. The keys at the top show or hide a type: lit white while the type shows. The slider at the bottom sets the tile size, and Add Source adds one. Drag the sidebar’s edge to make it wider or narrower. Drag a source onto a layer to make a shot. See Sources.
The monitors and the transition column
Section titled “The monitors and the transition column”The Preview monitor on the left shows what the next Take sends; you edit shots on it. The Program monitor on the right shows what is on air. Between them, the transition column holds TAKE, Auto or Cut, the transition and its duration, and the T-bar. Right of the program sits FTB, Fade to Black. Drag the divider under the monitors to resize them. See Transitions.
The layer strips
Section titled “The layer strips”One strip per layer, the first in front: the layer’s number, name and colour, its Clear tile, then its shots. A shot can have a tab along its edge with lamps for the shots it brings along, its element count and its Auto Out. Under the strips: Add Layer, Use Layer Setup… and Layer Display. See Layers, shots and sources.

The inspector
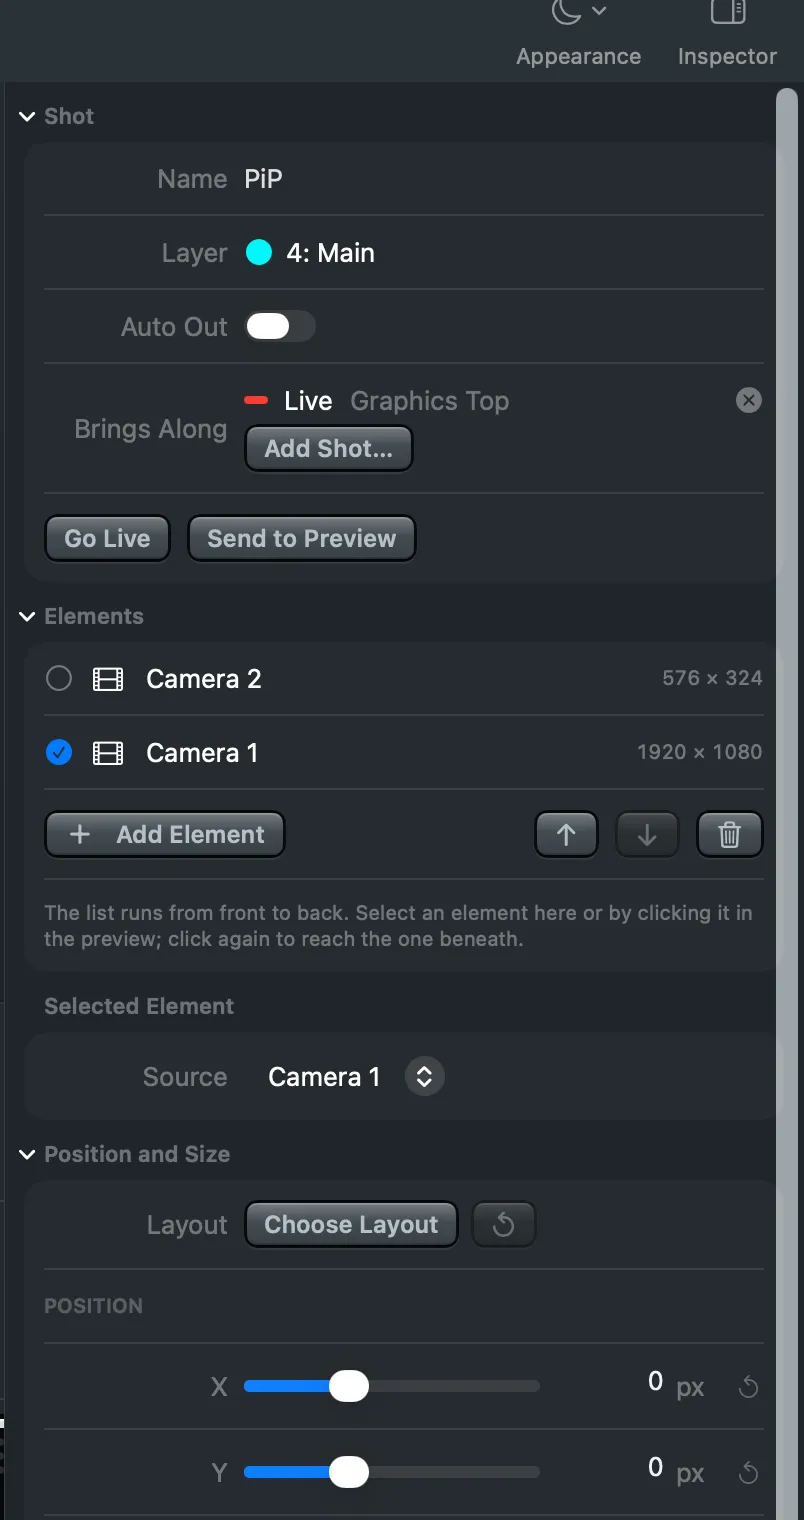
Section titled “The inspector”The settings of what you selected: a shot with its elements, position, look, effects and sound, or a source with its status and audio. With nothing selected it says No Selection. Show or hide it with the toolbar’s Inspector button. See Editing canvas.
Drag the inspector’s left edge to make it wider, from 320 points for a laptop up to 600 for a large screen, in steps of 40; this Mac keeps the width. On a screen too small for it the inspector narrows, and it returns to your width on a larger one. Its rows line up on one grid: labels on the left, and every slider starting and ending at the same place, so only the sliders grow.
The status bar
Section titled “The status bar”Along the bottom: the audio state, and how this Mac keeps up (the frame rate, the load and dropped frames). View › Show Status Bar (⌘/) shows or hides it.
The console
Section titled “The console”The Studio is drawn as a studio vision mixer, so it reads like the desk you know: shots are keys that light green in preview and red when live, each layer’s name sits on a small display, the monitors carry tally labels, and the toolbar’s keys say what a press does. Every window takes the same tones, anthracite in Dark and a cool grey in Light. Each key is still a Mac control, with its menu command, shortcut and VoiceOver name.
See also
Section titled “See also”Describes Live Producer 0.330 · 10 November 2026